Publish and share maps
The map or territory structure created in easymap can be uploaded to the easymap explorer with just a few clicks via the existing interface and shared with colleagues or superiors via the internet/intranet. In this tutorial, we will show you how to upload the map that you have created from the previous exercises to the easymap explorer upload.
All you need is a free test access for the easymap explorer Cloud service. To view the map you no longer need your own easymap.
Note: As an alternative to the Cloud Service, the easymap explorer be operated on a separate server if your company's IT policy does not allow the use of a cloud service You can find more information here.
Step 1: Publish a map
- You can share a map via the menu item explorer > Sharing....
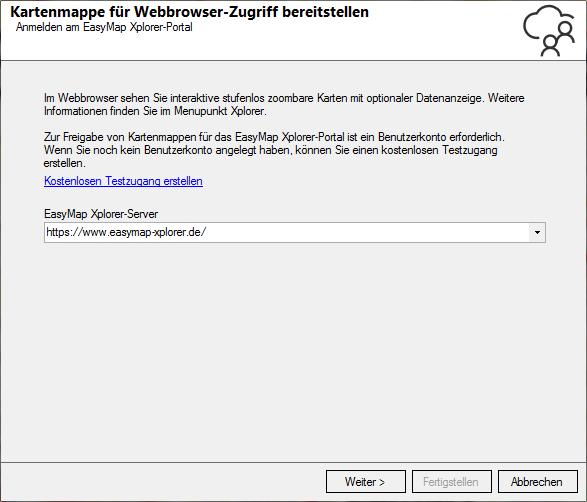
In the first dialog box, you are asked for the logon information for the EasyMap Xplorer portal. To log in, click Next and you will be redirected to the login window.easymap explorer-Portal asked. To log in, click on Next and you will be redirected to the login window.
- In the next window, select Publish mode and select the first option New to upload a new workbook.
Step 2: Enter title and description
In the window Other Settings, optionally enter a Title and Description of the workbook for the easymap explorer-portal on. Otherwise the name of the workbook is used as title.
- Leave all other settings as they are and click on Complete. The map opens immediately in your default browser.
Step 3: Set content

In this step, you can make various settings - for example, make map layers invisible, select a background map, or specify details for the placement and display of legends and data tables.
- Select Advanced Settings
- Select the layer Background Map and select the layer WebAtlasDE.light Road Map for Road Map.
- Then click Next.
Opening the workbook in the browser
If you are no longer logged in to the easymap explorer portal, you must log in again to view the uploaded map. First you will see a small graphic with a preview image and workbook description.
- Click on Display or on the thumbnail to go to the map view.
The map can initially only be viewed by you under your user account. If you would like to grant other users access to the map, you can invite them via User administration (accessible via the menu Profile).
- Via the menu Map catalogue you get an overview of your already uploaded maps.
Note: An alternative to user administration is the generation of public links. Please note that these links can be opened and distributed by anyone. However, for your security, you can optionally provide the links with a password and a temporary validity.
The online help for the portal of the easymap explorers you will find here.
Back to Start - Tutorial.
