Sales Territory Planning
The EasyMap DistrictManager Edition allows you to create and visualize territory structures. This chapter describes how you can create a new territory structure.
Please note that this exercise is only available with easymap professional or an old one easymap district manageris feasible. The demo version is automatically a
Step 1: Insert a base map
Open a new program window:
- File > New > New Window
Insert a map from the control window Base maps on "Sheet 1".
- To do this, you can drag and drop level 3 of the 982 postal routing areas from the folder Demo Maps, subfolder Germany, postal zone 2 onto the sheet. You can also add the topography.
Then read in the appropriate data table. For example, in our sample data, it would be the assignment table.
Step 2: Planning Mode
In order to create an area structure, please activate the planning mode first.
- Territory Organisation menu > Planning Mode
Only now are the corresponding commands available to you. Also the control window Territory organization is now open and can be used.
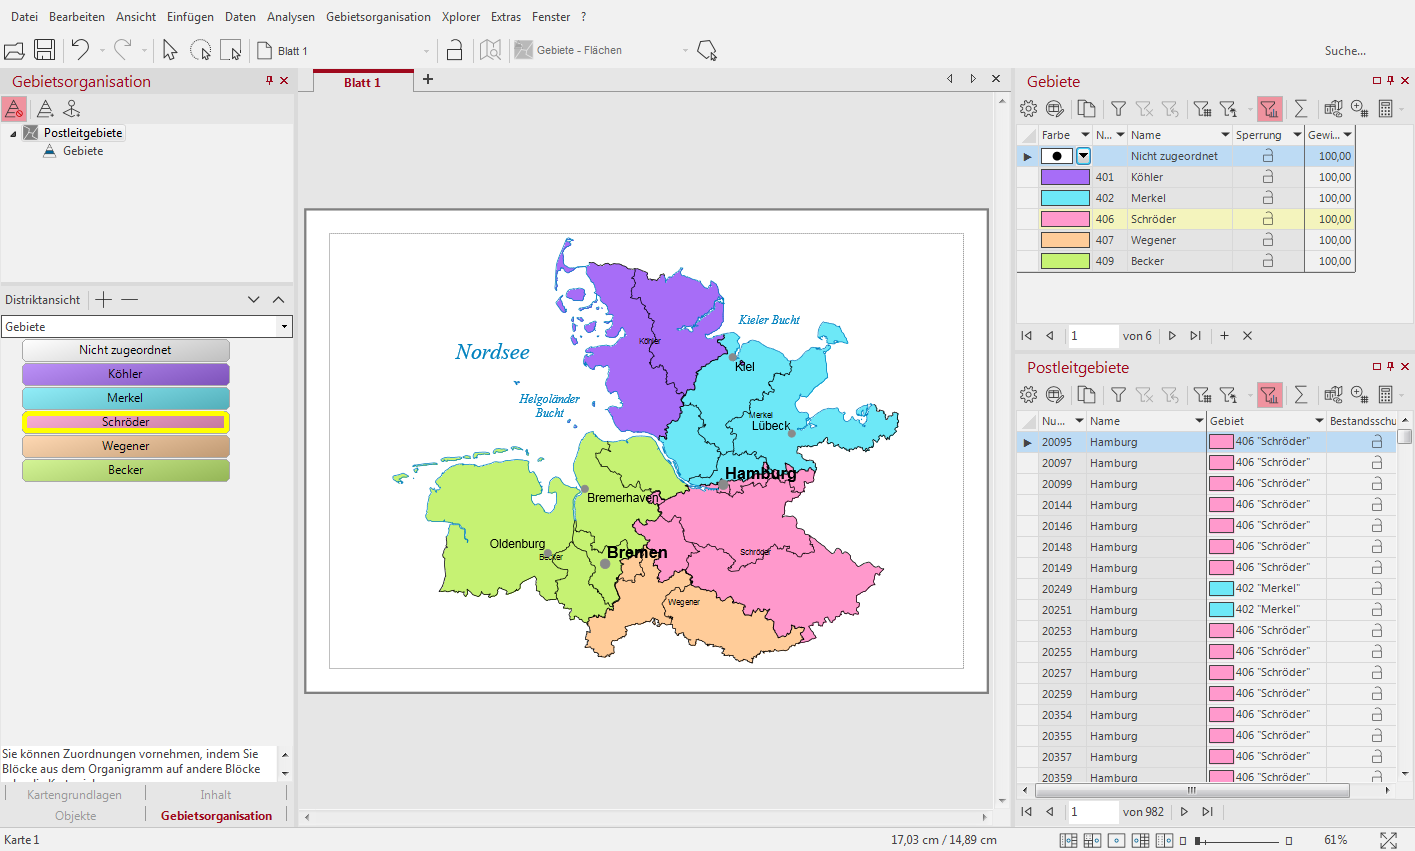
Step 3: Create New Territory Structure
- Open the Data control window and drag and drop the data column containing the territory structure for the territory organization onto the map.
- Select District Level from the new dialog window.
- Set your association between data and layer when placing.
- Confirm your settings with OK.
For each level of the territory structure, a table is created in addition to the map display. Of course, for the "sales territories" level, corresponding levels are also created in the Content control window, such as Labelling, Borders and Areas. These layers can be adjusted as usual via the context menu Properties.
Continue with the next step - Publish and share maps.
